This tutorial shows how to set up a Visual Designer project with the Funduino turtle, program it to avoid obstacles and then test and deploy to the real hardware.
While we are using the Funduino turtle for this tutorial we could easily use the Zumo turtle and change the challenge to something like a line follower. The principles are the same for both turtles.
The first stage is to create the new project and add the Virtual Turtle.
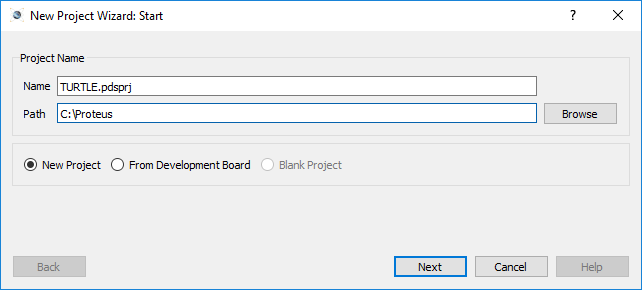
1) Open the New Project Wizard from the Proteus home page and specify the project name and destination path as required.
2) Create the schematic from the default template and then create a flowchart project with the Arduino Uno.
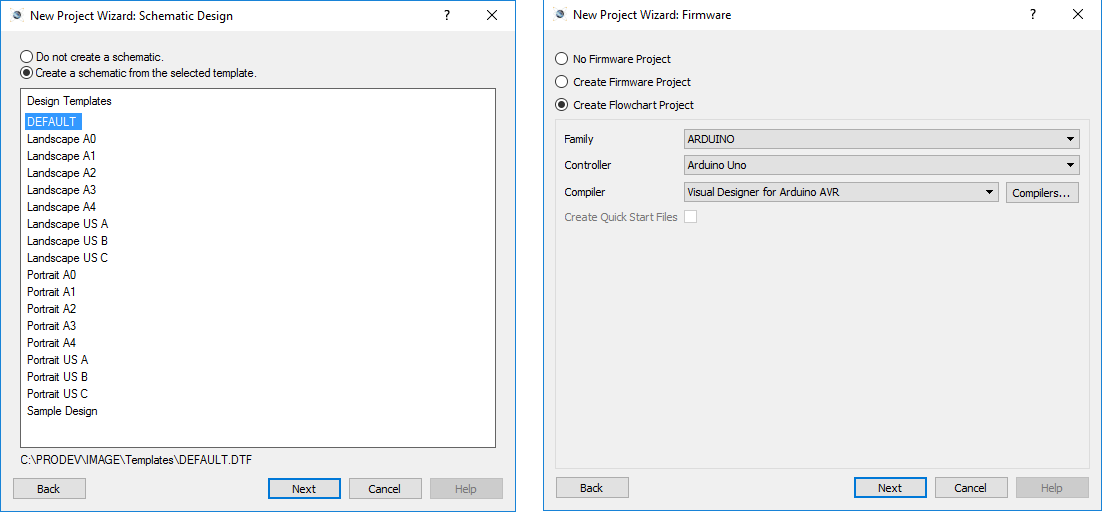
If your license key includes Proteus PCB Design you will need to choose not to create a PCB on that page of the wizard. If your license does not include PCB design you will not see the PCB design page of the wizard.
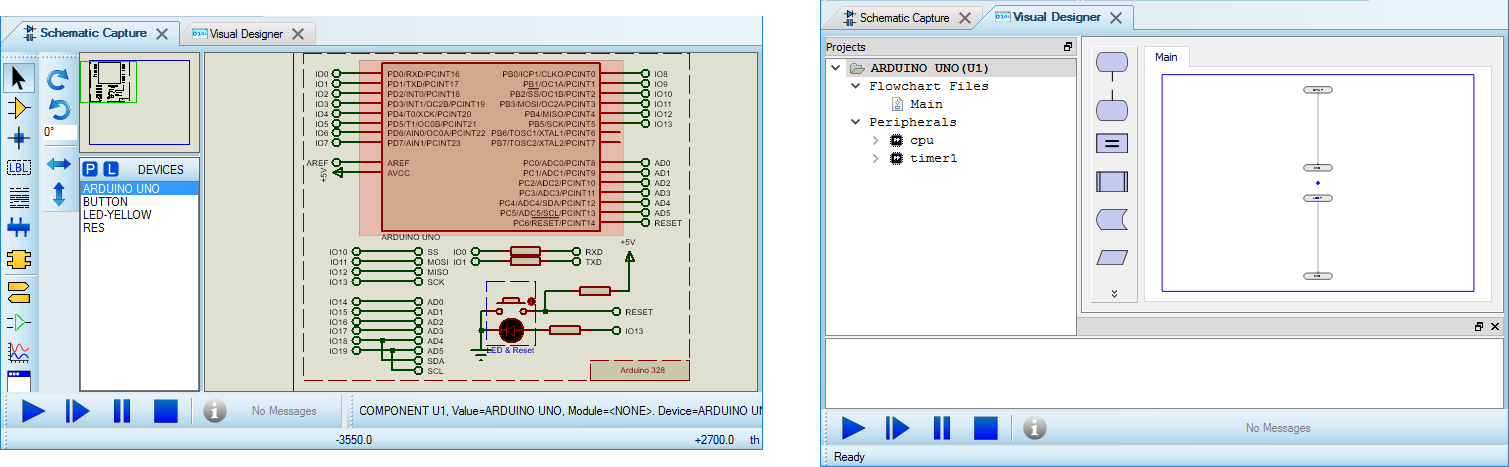
3) Continue and exit the wizard to create your project. You should see on the Visual Designer tab that you have a skeleton flowchart with the familiar Arduino setup and loop routines while on the schematic you'll find the Arduino Uno pre-placed.
4) We now need to add the Virtual turtle to the project. We do this from the Add peripheral command in Visual Designer.

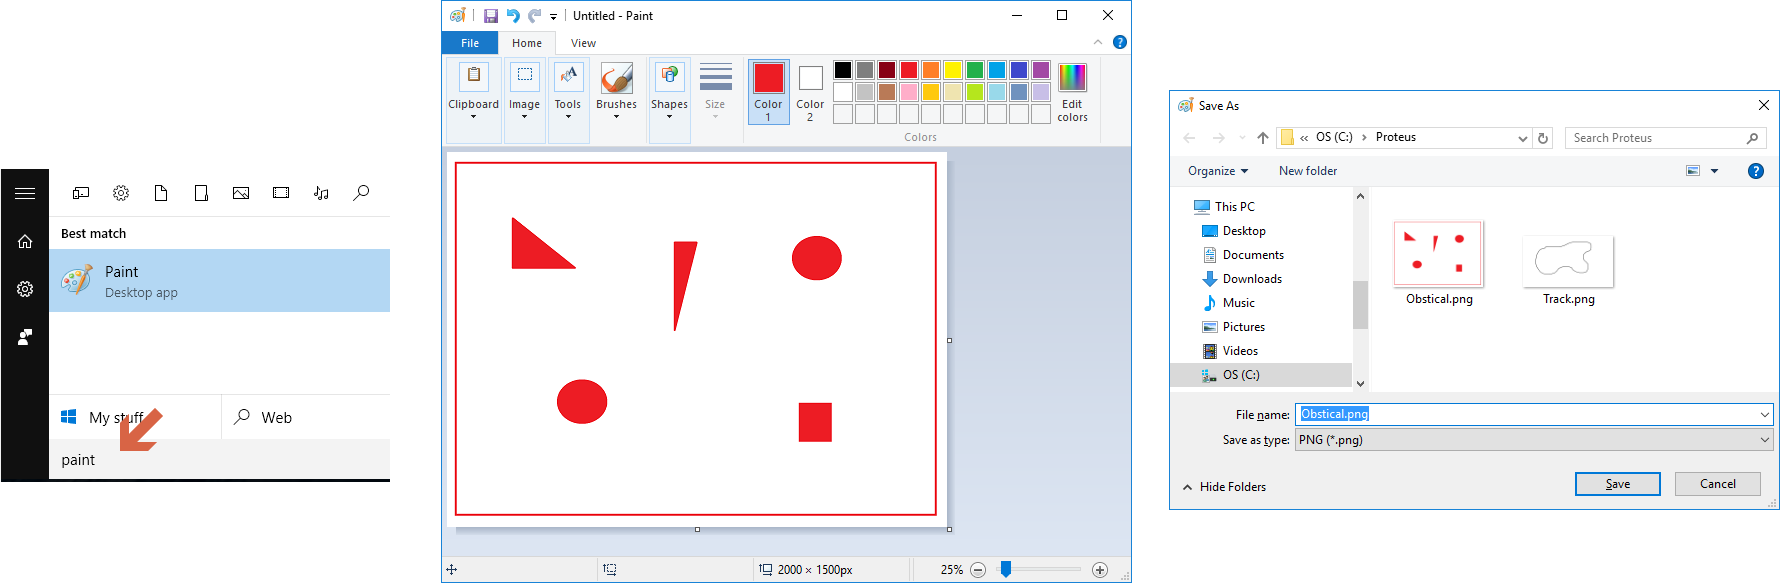
5) The next thing we need to do is create an obstacle map or virtual world for our turtle to simulate in. To do this we open MS Paint (click on START button and type in 'paint' in WIN8 or higher) or similar and draw some obstacles. The two vital points to remember are that anything red is considered an obstacle and that one pixel equals one millimeter. If we set our canvas to 2000 pixels wide by 1500 pixels that corresponds to around 2 meters by 1 1/2 meters in the real world which is plenty for an obstacle avoidance playground. After that, simply place a few red shapes inside a 'play area' to act as the obstacles and then save our as a PNG file.
If we were setting up a line-following environment we would use black lines for the course to be followed and then shrink the canvas size around the map (the world doesn't need to be much bigger than the race-course).
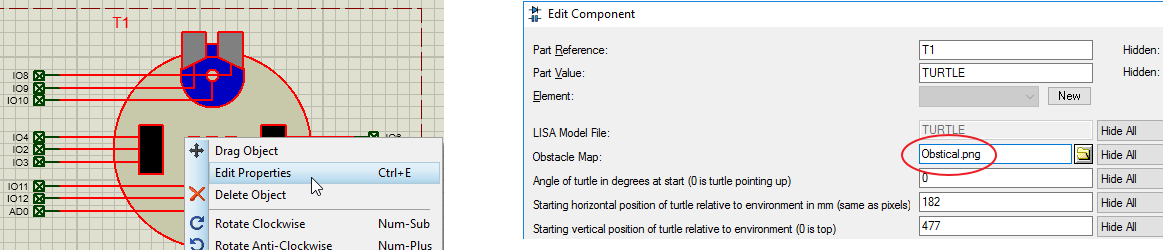
6) The final task is to tell Proteus which obstacle map to simulate the turtle inside. We do this by editing the Virtual Turtle on the schematic and specifying the location of the obstacle map in the resulting dialogue form.
When we added the Funduino turtle to our project above we received a number of high level methods that we can use on the flowchart to control the turtle. These are discussed individually in the Visual Designer methods topic which may prove a useful reference as we work through the program. We'll also assume here that the user is familiar with the basics of flowchart design in Visual Designer - these are covered in depth in other tutorials.
You'll find the completed program in the Obstacle Avoidance sample design so if you are comfortable with the firmware design you can load the completed version (File Menu -> Open Sample, type 'obstacle avoidance', select and open) and continue to the simulation and debug section of the tutorial.
Our basic algorithm will be to continuously send out sonar bursts (ping method), to compare against previous values (test if we are stuck) and then check distance to obstacle if not stuck (test if we need to turn now). The first step is to create some working variables and initialize them in the setup routine.
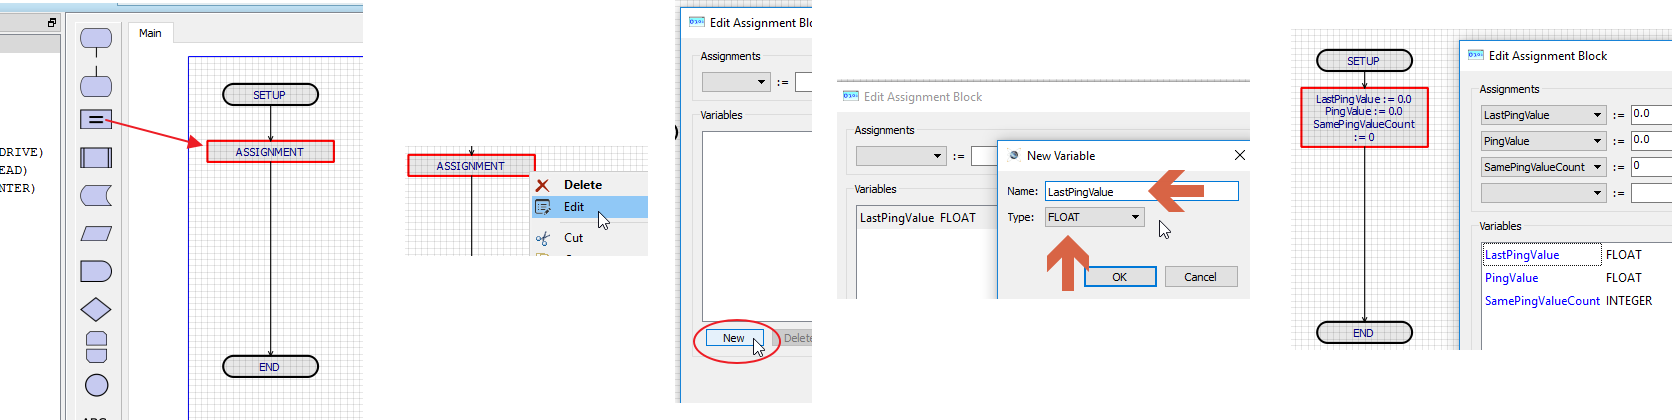
Add 3 variables: LastPingValue (Float), PingValue (Float) & SamePingValueCount (Integer).
At the top of the loop routine we then want to set out ping method by dragging and dropping from the project tree and assigning the result to our pingValue variable.

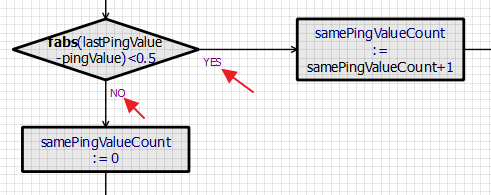
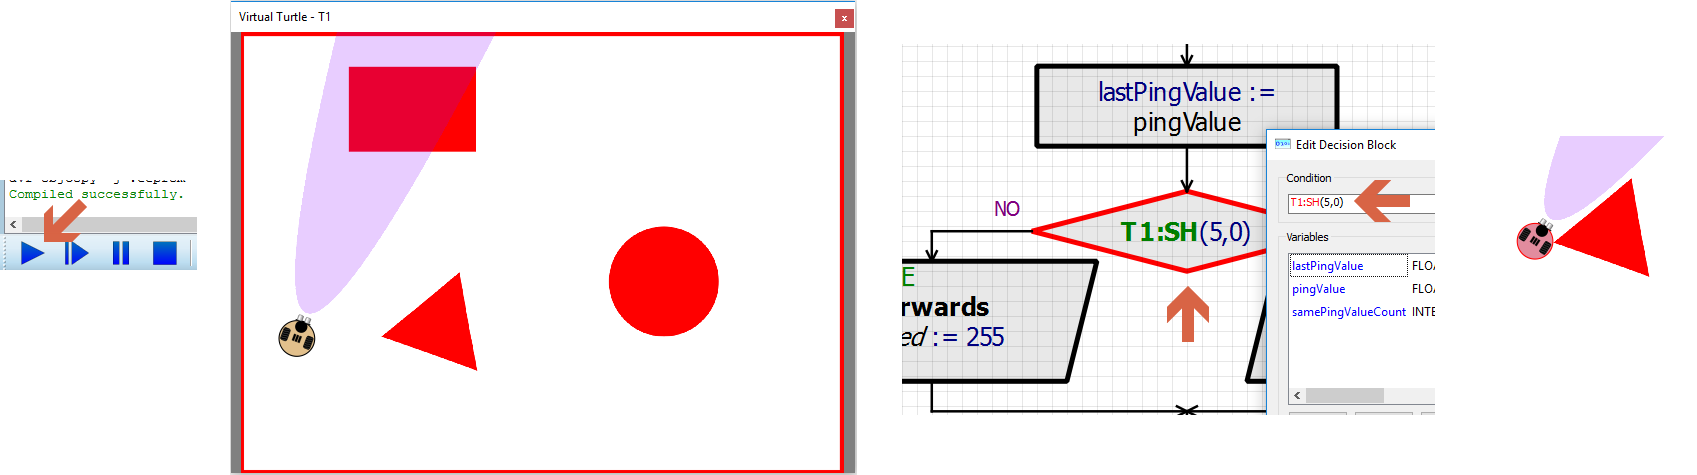
The result of this is the basis of our decision making. Our first test is to see whether the value is approximately the same as the last one. If it is we'll consider ourselves to be the same distance from the obstacle. What we need then is to place a decision block, subtract the current pingvalue from the previous ping value and we'll consider a difference of less than 0.5 to mean that our distance from the obstacle is unchanged. Note that we use the fabs() math function to return an absolute floating point value.

This branches our program into two forks, one where we are considered the same distance from the obstacle and the other where we are not. As in the image below, we do this by incrementing our samevaluecount variant in one direction (YES), or resetting it in the other direction (NO). This is done by dragging and dropping assignment blocks.
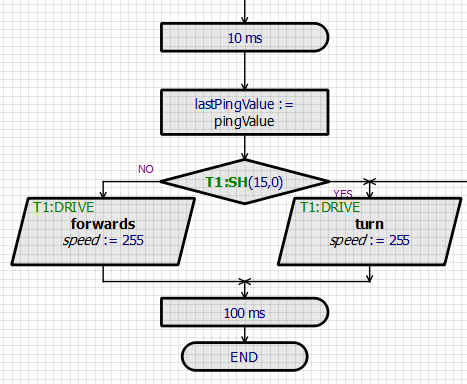
In the case where we are not stuck our job is fairly simple. Without going into detail we test whether we are closer than 15cm to the obstacle and we turn right if we are or keep going forwards if we are not. A delay is used at the end to allow a little driving time before the next iteration of the loop.
See Also:
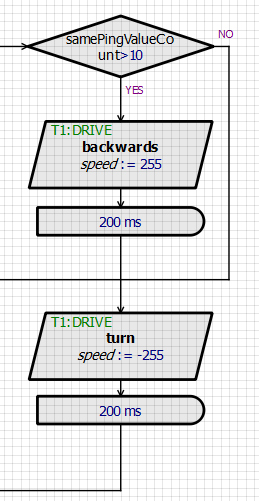
In the case where we may be stuck we need to test whether we have registered the same distance from an obstacle many times and, if so, we will reverse for a little bit and then turn right for a little bit before rejoining the main loop at the bottom. This is shown below.
As said earlier, the completed code can be found in the sample in the 'Avoid Obstacle' sample design in the Visual Designer section.
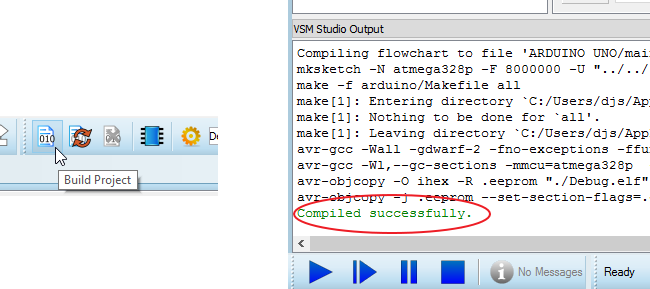
Having written our program we can compile via the Build Project command or the icon at the top of Visual Designer. Progress will be shown on the output window at the bottom of the editing window and we should eventually see a compiled successfully message.
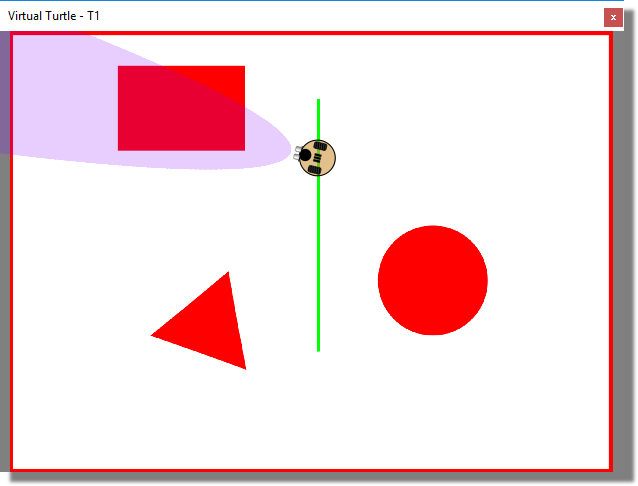
Pressing the play button on the animation control panel will then start the simulation. You will see a popup window hosting the obstacle map that we created in the setup and a little turtle driving around inside it. The purple cone shows the range and scope of the sonar and the turtle behaviour is dictated by the program we have just written. For example, if we stop the simulation and change the distance test from 15cm to 5cm and then re-run the simulation you will see that the turtle is getting very close to obstacles before turning and will actually crash when approaching at certain angles.
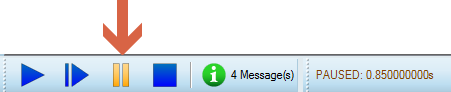
We can pause the simulation at any time via the pause button on the animation control panel
If we need to we can set breakpoints in several different ways :
1) Via the right click context menu on one of the flowchart blocks.

2) By drawing in green on the obstacle map.
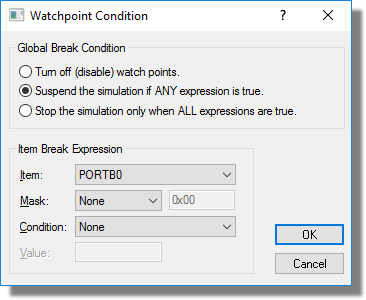
3) By setting up a condition on a watch window item.
Regardless of how the breakpoint is triggered, the reason that we set it is so that we can investigate the behaviour of the turtle more closely at that point. With Proteus, we are in the unique position that we can control time because the turtle is simulating under our control. This means for example that we can step through the code and the turtle will behave exactly as it would have were there no debugging in place (motors won't lose momentum etc.).
We can step through the code for our turtle program at multiple levels:
1) At flowchart level by right clicking and setting a breakpoint on the flowchart block.
2) At source code level by first stopping the simulation and then selection the debug generated code command from the project tree.
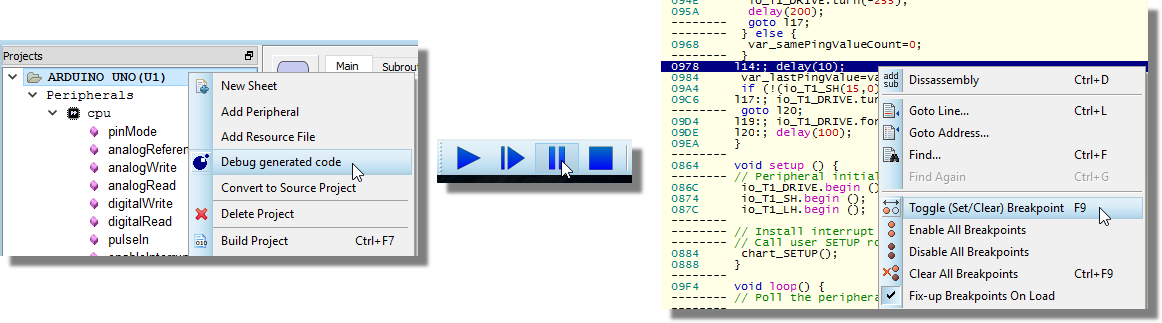
Make sure you use the Debug Generated Code command and not the Convert to Source Project command here. This will switch your project from flowchart to source code but it is not a reversible operation.
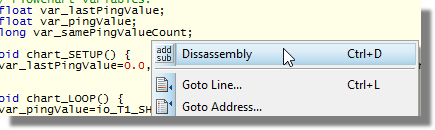
3) At machine code level by selecting the disassembly command from the context menu.
In either case the single step commands can be found on the debug menu or via the icon strip at the right hand side of the main window.
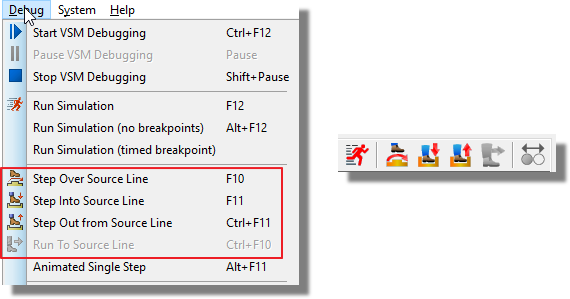
You can also use the shortcut keys F10 for step over and F11 for step into.
See Also:
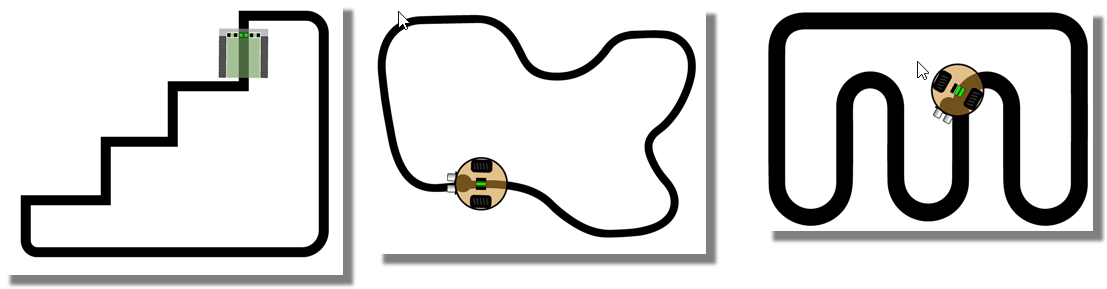
One of the neatest things about virtual turtle simulation is just how easy and fast it is to test your program against challenges of different sizes and complexity. All you have to do is change the picture and then enter the name in the properties of the component. Here's a few line following examples
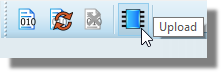
Proteus includes built in support for the common AVRDUDE programmer so that you can program the real hardware directly from the Proteus software.
This process is discussed in full in the Visual Designer help documentation linked below.
See Also:
Programming the Physical Hardware